Creating Splash Screen in Android Application
Today in this post, I am going to show you how you can create Splash Screen in your Android Application. Splash screen is the first screen that loads in your application which normally has logo the company or application logo. I will be doing all the android examples using Android Studio. The full project can be downloaded from : http://www.filehosting.org/file/details/525030/Splash_Screen_AndroidExample.zip . Lets get started and create an Android Project in Android Studio
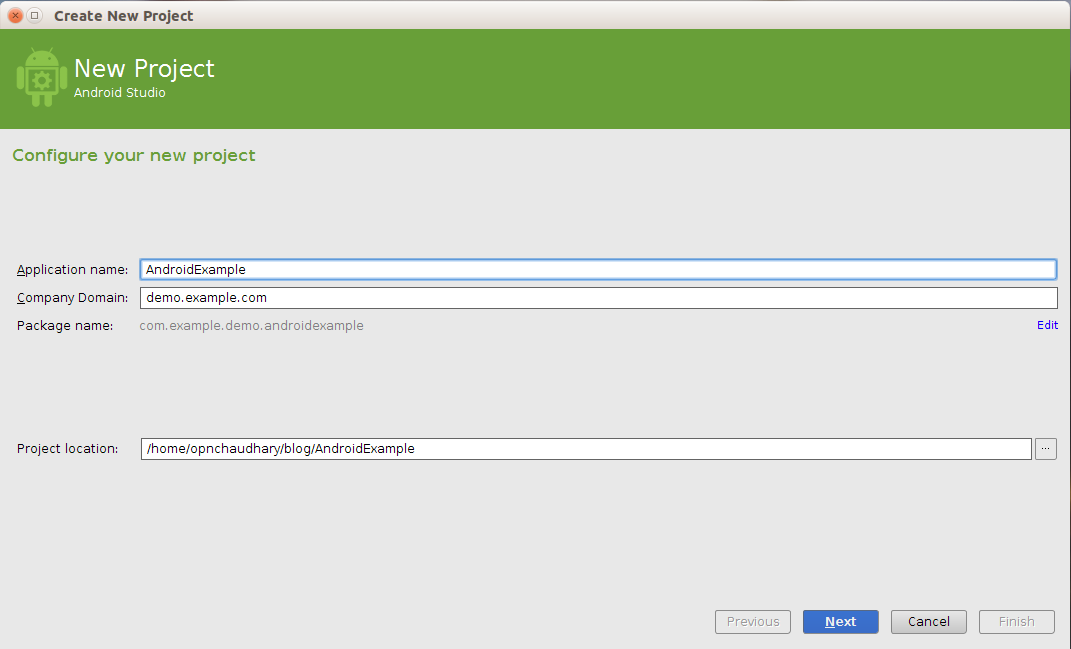
1. We have named our app 'AndroidExample' and the package name is 'com.example.demo.androidexample' which is just the reverse for our company domain 'demo.example.com'. The package name should be unique for all the android applications, so its suggested to use the company domain name or application website domain name for the package.
1. We have named our app 'AndroidExample' and the package name is 'com.example.demo.androidexample' which is just the reverse for our company domain 'demo.example.com'. The package name should be unique for all the android applications, so its suggested to use the company domain name or application website domain name for the package.

2.We will choose the devices for which we are going to develop the android application. We will chose 'Phone and Tablet' for now. The API level is selected as API 14. This means that our Application will run in Android 4.0 and above versions.

3. Here we will chose a blank activity for our purpose.

4. Lets give name to our main activity as shown in the following image.

5.Now we have create an android project. Lets run it before we start creating a Splash Screen.

You should have a
Now we will add an activity to the project called SplashActivity. The SplashActivity class should look like:
We also modify the AndroidManifest.xml file to:
We also need to create a layout file activity_splash.xml. You can design the page the way you like. I have used an image and a textview.
Now run the app and you should be able to see the splash screen. You can modify the splash screen the way you want. You can download the source code from : http://www.filehosting.org/file/details/525030/Splash_Screen_AndroidExample.zip


Comments
Post a Comment